


How to install
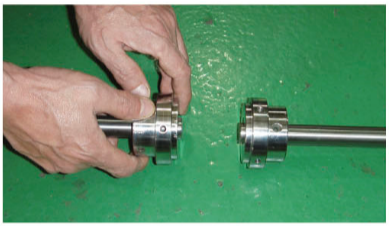
Step 1
- Inspect both shafts (driven & driving) and hub bores and confirm they are clean and no dirty particle or burrs.
- Be sure that keys fit shafts properly.
- Mount both hubs to the shafts securing only one hub while the other side hub should be loose for minor adjustment of spacing.
- In case of tapered being used, follow bushing manufacturer's instructions is required.
- If hub is bored for an interference fit, we would like to recommend heating the hub in water, oil bath or an oven and after heating, immediately positioning it on the shaft.
- Be careful Spot heat may cause distortion.
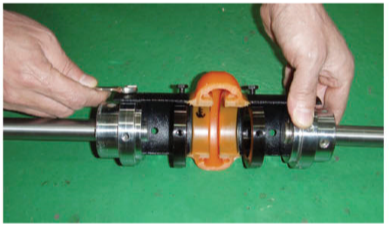
Step 2
- Place half of the element around hubs and secure with capscrews provided.
- The element will space the other hub. It is important to have capscrew properly tightened.
- For placing proper capscrew, see Table 1 on Installation Instructions for recommended capscrew torques and instructions.
- Now secure the other hub to the shaft.
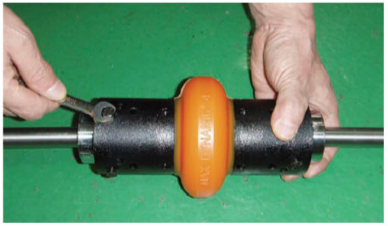
Step 3
* Aboves shown Spacer type coupling installation ; the same procedure applies for the standard, HT, and HS type coupling.
*Helpful tip
If the capscrew holes in the element do not line up with the hubs properly due to equipment misalignment, please rotate the shafts as you can install each capscrew. For larger couplings, first install the capscrew that is positioned in the center of the half element.
- Mount other half of the element to hubs.
- Tighten all capscrews to the recommended capscrew torques in Table 1 on Installation.
* Aboves shown Spacer type coupling installation ; the same procedure applies for the standard, HT, and HS type coupling.
*Helpful tip
If the capscrew holes in the element do not line up with the hubs properly due to equipment misalignment, please rotate the shafts as you can install each capscrew. For larger couplings, first install the capscrew that is positioned in the center of the half element.
Recommended Capscrew
| No. | Torque | |
|---|---|---|
| kgf.m | N.m | |
| D-2 | 2.3 | 22.56 |
| D-3 | ||
| D-4 | ||
| D-5 | ||
| D-10 | ||
| D-60 | 10.2 | 100.06 |
| D-70 | ||
| D-80 | ||
| No. | Torque | |
|---|---|---|
| kgf.m | N.m | |
| D-20 | 4.1 | 40.22 |
| D-30 | ||
| D-40 | ||
| D-50 | ||
| D-100 | 37.7 | 369.84 |
| D-120 | ||
NOTE
- A bolt having the highest tension should be used.
- Locktite as an adhesive should be used.
- A bolt should never be used twice.
- Never treat a bolt with oil.
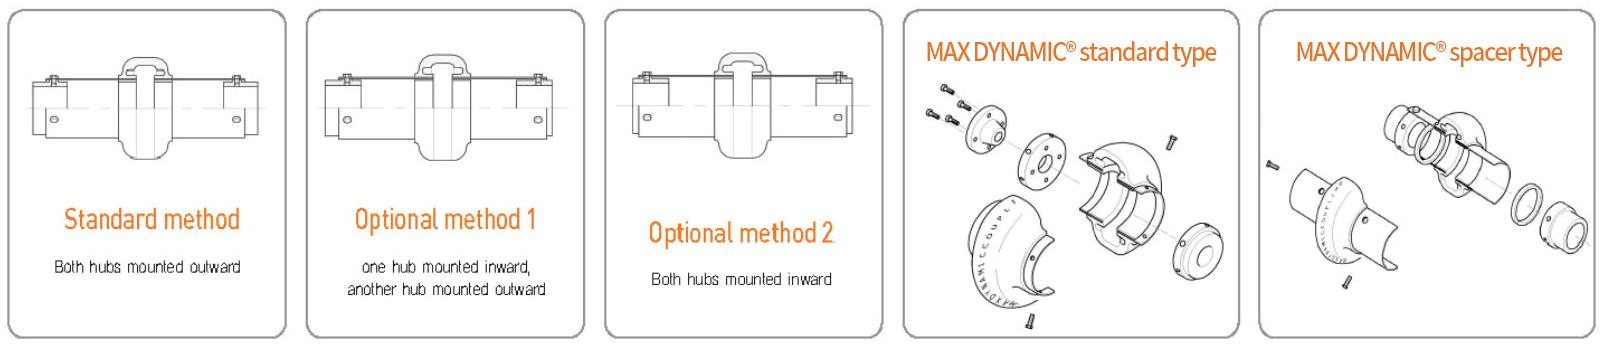
The method of assembly
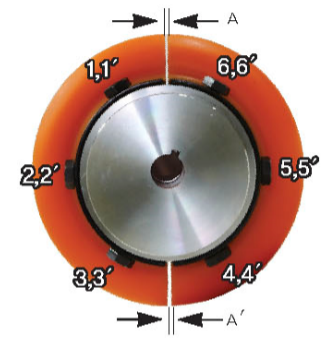
- Adjust the face of A and A'at same space.
- Adjust Hub's Minimum space.
- Assemble the bolts in the order of 2-2', 5-5', 3-3', 4-4', 6-6'
- Assemble the bolts in the middle part of the edge.
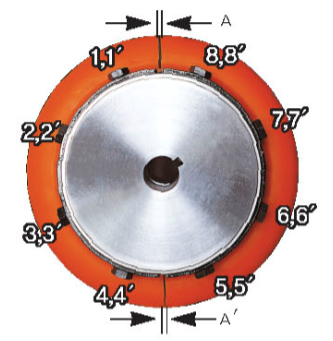
- Adjust the fac of A and A' at the same sapce.
- Adjust Hub's Minimum space.
- Assemble the bolts in the order of 2-2', 7-7', 3-3', 6-6', 1-1', 4-4', 8-8', 5-5'
- Assemble the bolts in the middle part of the edge.